Caution : Picture heavyyyyy!!!
Its that time of the year when people are giving/buying, diaries/ journals etc.. Most of the times, i've started off with a full 'josh' in the new diary and lost interest mid-way.. then came the colourful handmade books and i've been hooked to them ever since... Since they were pretty expensive, i used to jus look at them and put 'em back in the shelf and come home.. One fine day when i was bored, i decided to make my own handmade book and from then on, i've been tryin to experiment with these kinda books...
If you'd like to make for yourself or to gift someone else, here's a simple method :) ...
Pull out all your artsy stuff and let your creativity flowwww :) ...

You'll need :
Mill board ( i dunno what its called otherwise.. its a pretty firm board )
Papers/Sheets of your choice (for the book.. and the no. of papers depend on what you are gonna use the book for.. I usually make a 100 paged one )
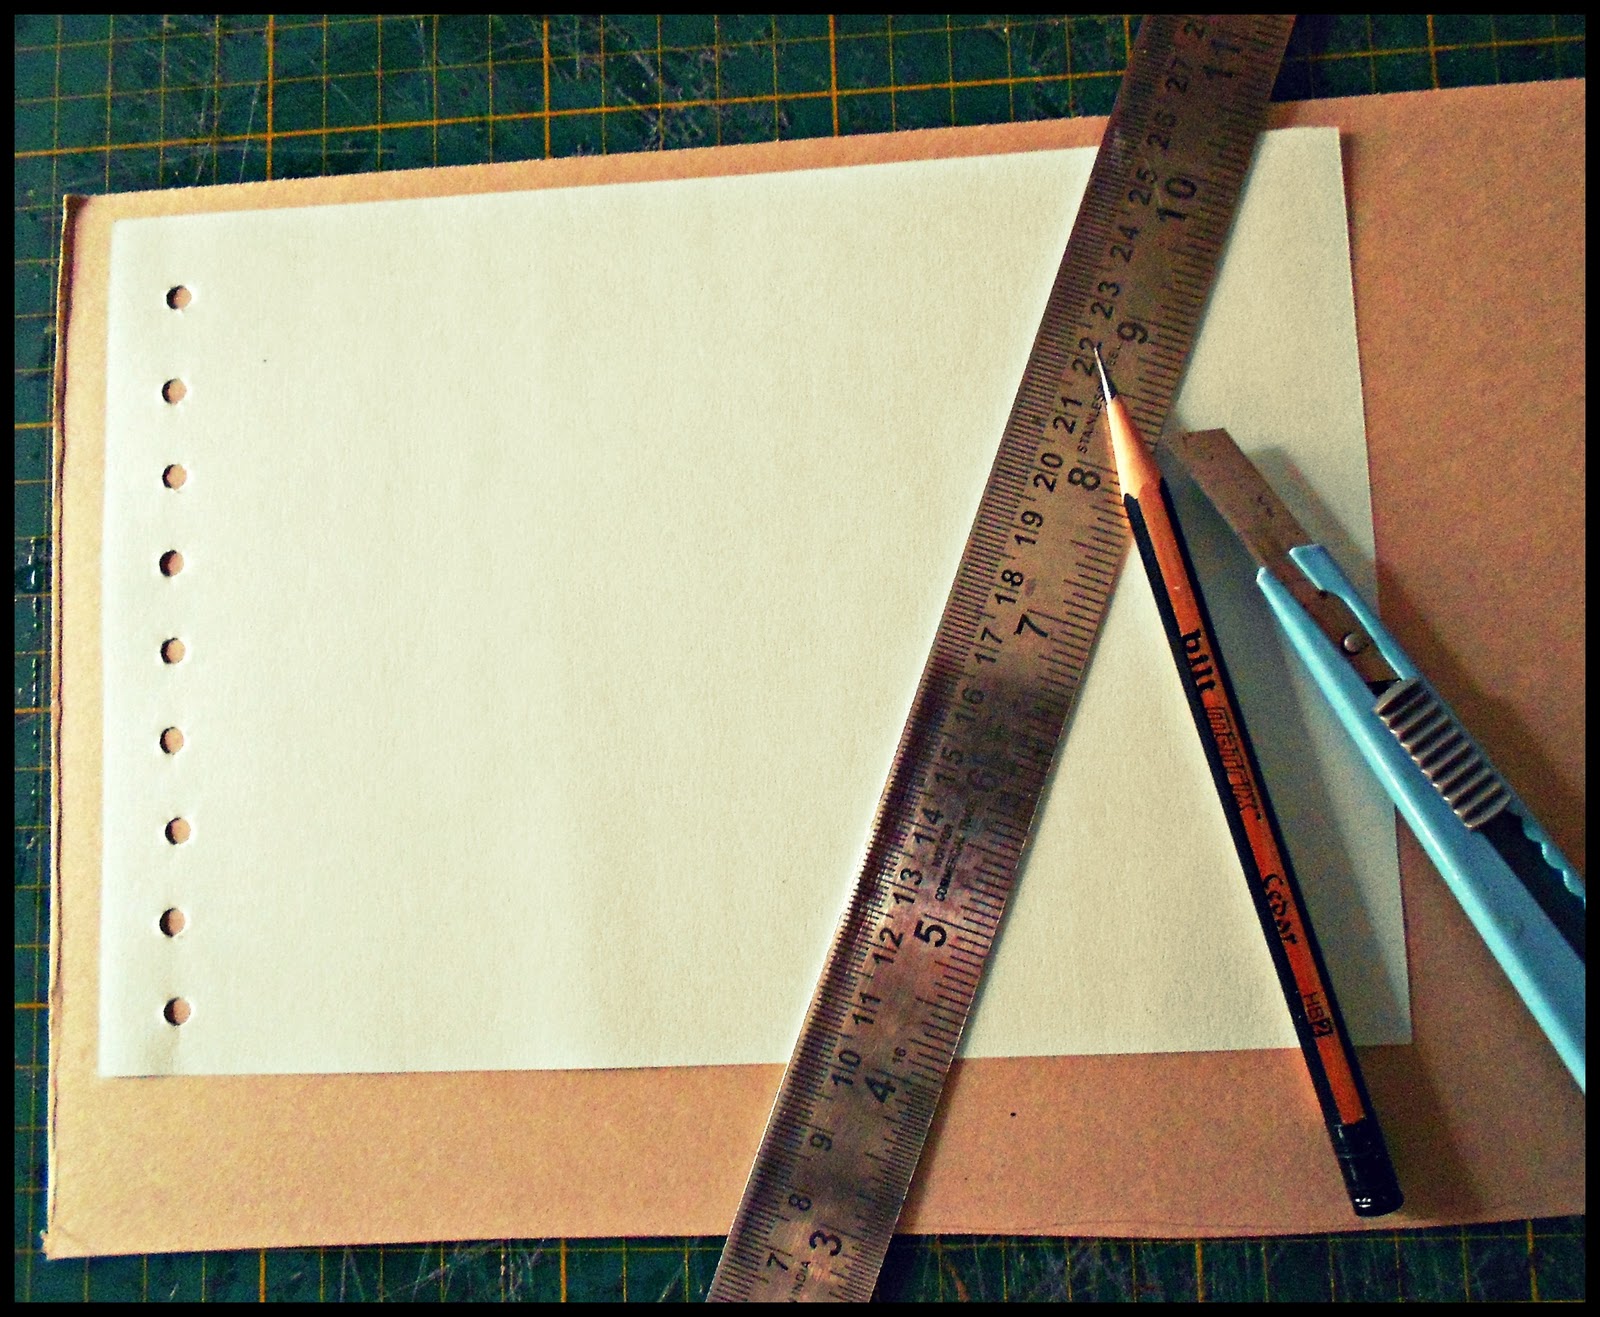
Cutter
Steel scale
Glue
Pencil
Single punch ( it'll be awesome if you have one of those cute li'l shaped ones ) :D
Jute thread/Ribbons/ Coloured cotton twines
Needle
Paper clamps

For the cover :
You can absolutely use anything! from hand made paper to plain coloured charts to recycled paper to fabric or even make a collage on a plain paper of all your fav things or pictures of you/your friends/family/pets.. absolutely anything!
I chose a white grass paper for the front cover and brown textured sheet for the back cover
For the insides of the cover, Black paper is the safest :)

If you are feeling more creative, bring out all the paper cuttings / Photo colours / poster colours / anything!! to make a 'hatke' cover or even personalize the sheets inside.. :)


I wanted half of A4 and thatsy had to cut the A4 sheets into half..
Align the paper and slightly centre fold the paper and keeping the steel scale as guide, cut the sheet ( I don't like folding the paper into half and sliding the blade through that.. it kinda gives a very unfinished look )
This will be your reference sheet.


Make sure all the sheets are of the same size.


Do the same thing for the other side of SAME mill board.


Let the back cover dry.

On the mill board, mark 2 cm from the edge where you have punched and draw another line from this 2 cm ka line at a distance of 0.2 cm.


One from the punched edge and the other from the other corner of the cover page.
There should be a gap between both pieces of the mill board.

Stick it onto the mill board.

Do it both on the outside and inside.
This is done for easy opening and closing of book.


I like the rustic and earthy feel of the jute thread.


You can try various kinds of double punch designs and experiment with the binding itself if you are making a simple cover page.

For simple binding, you can do various kinds of designs with paints on the cover page or you can even stick different textured sheets on the cover page.
I'm a hugggeee fan of bamboo designs and hence the bamboo painting for the orange book. :)
Have fun writing, sticking a million pictures, pinning movie tickets /memories/ leaves anything! :) :)
I would love to see what you guys came up with :D .. do lemme know! :D

10 comments:
Wow this one looks great! I m making one for this year soon :) Will post the pic when its ready :) Thanks a lot for posting this craft :)
Wow this one looks great! I m making one for this year soon :) Will post the pic when its ready :) Thanks a lot for posting this craft :)
Awesome creativity man! It is soooooooooo cute :)
nice idea :)
Viyaaaaaaaaaa!!! :D :D This is SO freakkin' pretty!!! :D :D I LOVED the bamboo one!Drool worthy!! And you must be really patient to do this na...I leave sketches mid-way coz m bored. Heaven knows I won't be able to do this one!! :D :D But I enjoyed reading this nonetheless!! <3 <3
Ever since my childhood days, I have nurtured this little dream to come up with some thing like an arty-crafty diary of my own and please mind it that I HAVE tried zillion of times with the tag of doing something creative.
I wonder why I sucked at it every single time.
And you my girl, have stirred that seed of making a diary and have given me a heartfelt guidance too. So thanks a LOT for that darling. I could see your zealous dedication. :* But deep down I have this feeling that I would suck at it again. *why God why*
Sigh!
And I should learn to have some control over my blabbering tongue. Nostalgia does this to me always.
I did the exact same thing for my mom's birthday last year! Except I dint use a mill board, I just used a very think chart paper kind of sheet (I dunno what you call it) and covered it with a colorful piece of fabric!
Bamboo one is really nice! :)
@ Maithili : aww thank you! :D :D and yesss please do post a picture of whatchu did :D :D :)
@ keirthana : aww thank you! :D
@ Deepika : Dhanku! :D
@ Pradeeta : where have you disappeareeeddd???? :P
aww thank you btw! ;) you shud try making one ;) its real easy to make this :D teehee :)
@ Mirage : Whoa! :D lol.. it did take me a lottt of practice to come with some decent ones ;) but i ended up using the crappy ones too for college notes and other boring things :P ..
hehe.. don;t worry :) Keep trying and u'll def master it soon :) its real easy.. once you get the basics right, you can experiment like anything! :D jus give it a try! ;)
@ Chandana : so cute! :D i wanna seeeeeee :) .. umm.. maybe its buff board or thicker card board or sumthin.. :)
Thank you! :D :D i'm kinda still experimenting with different kinda bamboo stuff :)
Wow :) this is such a good post. Hats off for all that patience. Do you also gift such notebooks? Very pretty!
MTT chuyên cung cấp những sản phẩm tăng cường sức khỏe đời sống như thuốc bổ cho mắt
thuốc tăng cường trí nhớ
triple omega 3-6-9
thuoc multivitamin
thuoc giam can tot nhat
mỹ phẩm sakura nhật bản
Bạn đang thắc mắc hay phân vân lựa chọn cho mình loại kem chống nắng cho những ngày hè sắp tới ? Hãy đọc bài viết của chúng tôi để có sự lựa chọn tốt nhất cho mình
kem chống nắng nào tốt nhất
Post a Comment